Learn How to Make the Crochet Linen Stitch
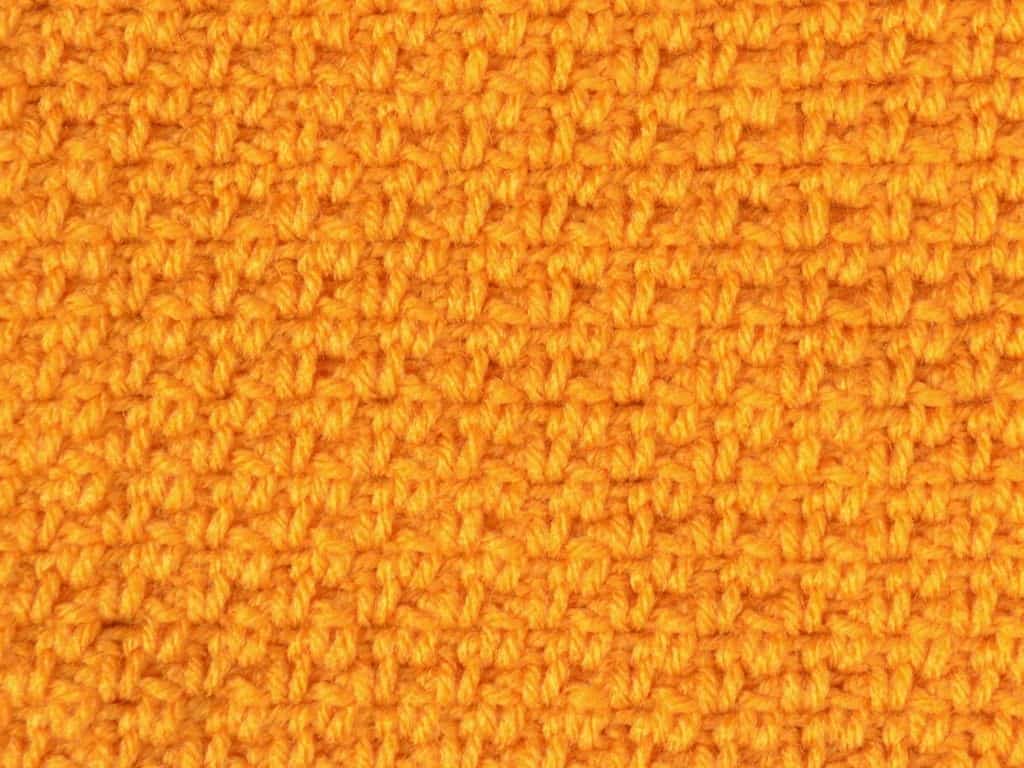
If you love making things that are easier than they look, the crochet linen stitch is going to be your new favorite stitch. Beginning crocheters love this stitch because it is made from single crochet and chain stitches only. Seasoned crocheters love it because it creates fabulous texture and is a stitch that you can practically zone out while making.
The linen stitch is also called the moss stitch and sometimes called the granite stitch. I don’t know why it has so many names, but it’s just something to be aware of as you search for projects to make with your soon-to-be favorite stitch.
What is the Linen Stitch?
The linen stitch is a combination of two stitches – single crochet and chain – that are repeated the length of the row. The chain stitch creates a gap in the work that will come into play as you build the rows.
Later on, I’ll run you through how to make the first row, but for the main body of the project, the linen stitch directions are worded like this:
Chain 1, single crochet into the chain space from the row below
Repeat the above steps for the entire row. That’s it!
You will find lots of crochet projects that are made with the linen stitch. Its tight weave is great for housewares, and I love it for scarves and shawls. The texture provides a lot of visual interest, even when using a single color, but stripes take on a unique look that I think you’ll really love.
Note: This tutorial uses US Terminology when referring to the single crochet stitch. Use this guide to reference the corresponding UK terms.
How to Get Started with the Linen or Moss Stitch
Let’s gather the materials you’ll need to make this stitch.
- Yarn – I used Red Heart Super Saver in Gold and Pumpkin
- Hook as defined by your yarn (I used my I / 5.25mm hook)
- Scissors
- Yarn needle
If you need more help learning how to make single crochet stitches, I have stitch tutorials for both right-handed and left-handed single crochet.
Tips for Successfully Making the Linen Stitch
As you’re working the linen stitch there are a few things to keep an eye on.
Keep your tension consistent. You want to ensure that the spaces created by the chain stitches are the same size throughout each row.
Do not make your turning chain too tight. To maintain straight edges, the end of each row will end in a single crochet stitch into a small space between the turning chain and the first single crochet of the row below.
Be patient with this stitch. Because you crochet into the chain space, and your using single crochet stitches that are already very short, projects with this stitch will take a while to grow.
Steps for Making the Linen Stitch
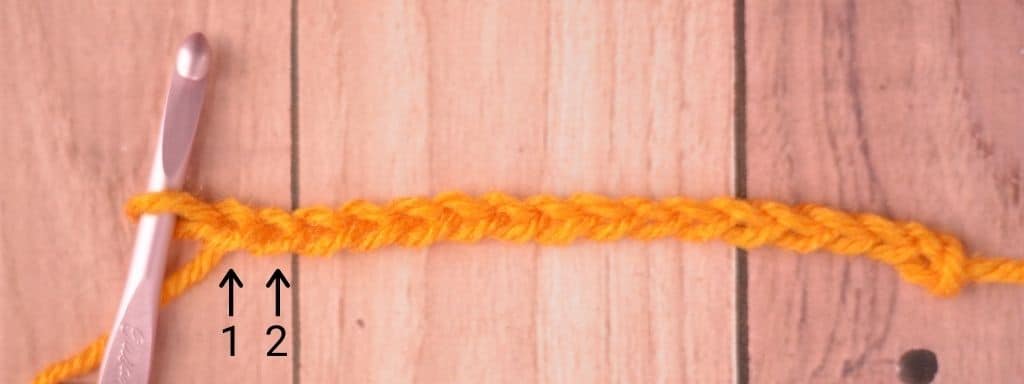
Step 1: Make a Foundation Chain
For your foundation chain, you need to make an even number of chains. It can be as long as you want, but for a swatch, I’d recommend somewhere between 20-30 chains.
Step 2: Single Crochet Into the Second Chain From Your Hook
Do not count the loop on your hook. Count two chains from your hook and place your first single crochet stitch into that second chain.
Step 3: Chain 1, Skip Next Chain, Single Crochet (Repeat to the End of the Row)
In the image below, I’ve made my first single crochet stitch. Next, I need to chain 1, skip the next chain, and then single crochet into the following chain.
So, in other words, repeat the “chain 1, skip next chain, single crochet in next chain” combination to the end of the row, placing the single crochet stitches into every other chain.
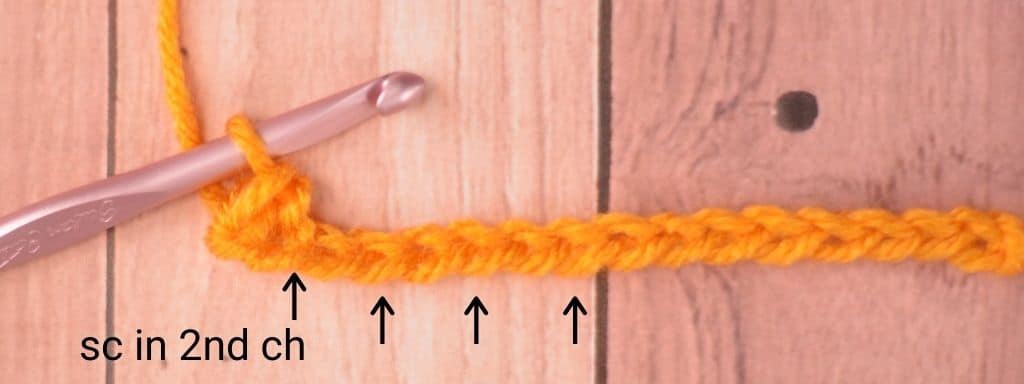
Step 4: Repeat to End of Row
Continue with those chains and single crochets until you reach the last foundation chain. At the end of the row, the last stitch will be a single crochet stitch.

Common Questions About the Linen Stitch
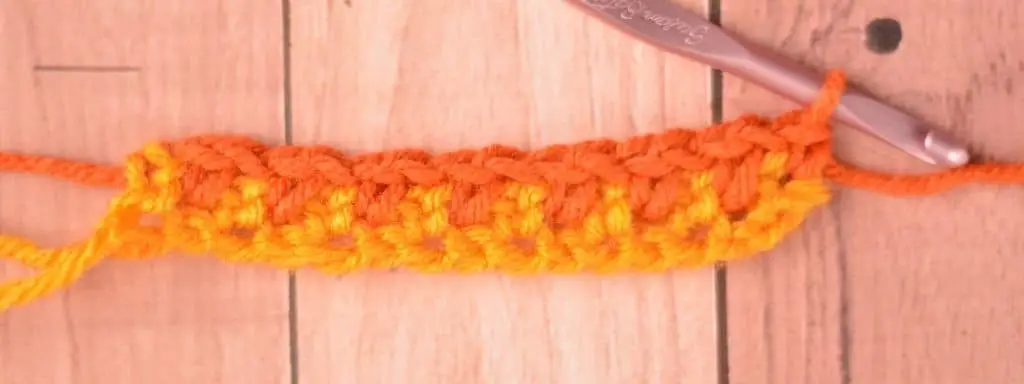
How Do You Transition to the Second Row of Linen Stitches?
After you get to the end of each row, turn your work. Then chain one (called a turning chain). Now, you’re ready to create your first single crochet stitch into the “chain space” from row one.
As in step 3 above, you will “chain 1, skip one, single crochet into the chain space” pattern to the end of this row.
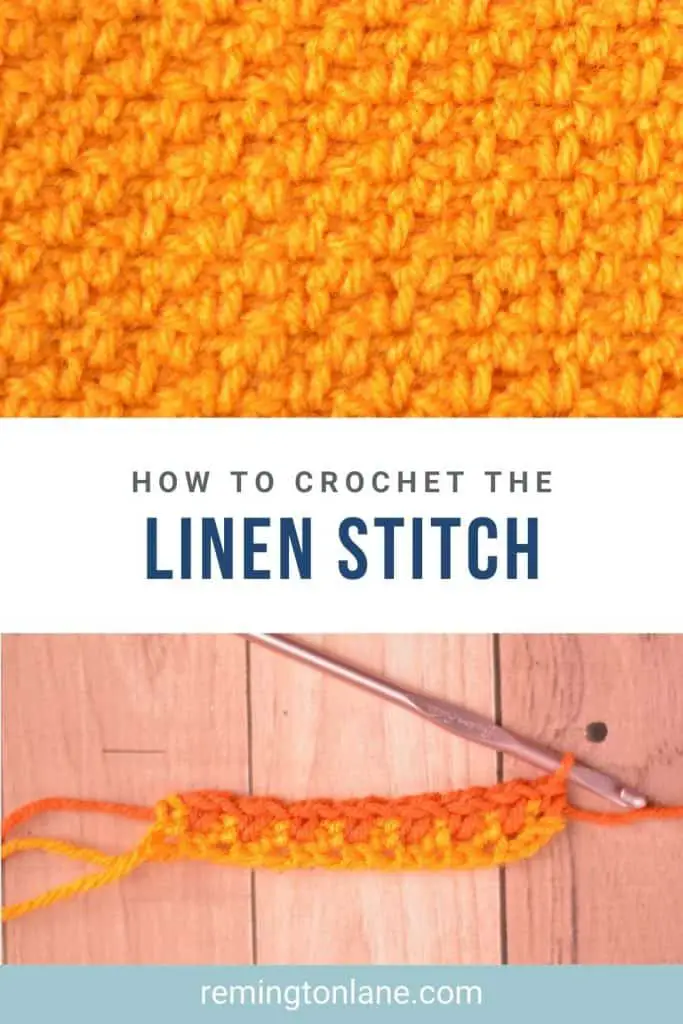
In the image below, I used two different color yarns so that you can see the difference between row 1 and row 2.
How Do You Finish Off a Row of the Linen Stitch?
When you get to the end of each row of your project, your last stitch will be a single crochet stitch. It will go into the tiny space created by the turning chain and first single crochet stitch from the row below.
You might have to pull on the turning chain with your fingers so that you can open up the hole a little bit better to see it.
What Are the Variations That Can Be Done With the Linen Stitch?
There aren’t really variations of the linen stitch because you can’t really create this texture any other way. However, the same concept can be applied with other stitches.
For example, you can use double crochet stitches instead of single crochets. The chain space will be much larger.
You will also find designs that contain multiple chains between stitches and putting multiple stitches into the chain space.
The Last Thing You Need to Know About the Linen Stitch
When you’re ready for more, add in some stripes. You can change colors every stripe, or create stripes of different sizes. The possibilities are endless.
Also, have fun with this stitch and be patient! It takes a while to grow your projects with this stitch, but once you get the hang of it, you will be able to zoom along pretty quickly.
Want more practice with the crochet linen stitch? Check out these fun projects
I’d love to see what you make with the linen stitch! Connect with me on Facebook and Instagram and show me your work. To learn more crochet stitches, be sure to visit the stitch tutorial library.


Leave a Reply