How to Make Single Crochet (SC) Stitches If You Are Right-Handed
The single crochet is one of the basic stitches that every right-handed crocheter must know how to make. It is a beginner stitch that is used in any kind of project.
Are you looking to make amigurumi (aka those cute stuffed animals or toys)? Then you must know how to single crochet. What about dishcloths and other housewares for that upcoming wedding shower? Yep, you’ll find single crochet stitches in those too.
The single crochet stitch was the very first stitch I learned, so if you are new to crochet, this is a great place to start. Once you understand this stitch, you’ll be hooked (pun intended) and ready to take on more stitches.
Are you left-handed? Hop on over to my tutorial just for lefties.
What is a Right-Handed Single Crochet Stitch?
For starters, crochet stitches are not left- or right-handed. So, you will not find patterns identified as right-handed. You simply pick your pattern, hold the hook in your right hand, and get going. This means, you can make any pattern out there, so go crazy!
Single crochet stitches will be abbreviated as SC in patterns.
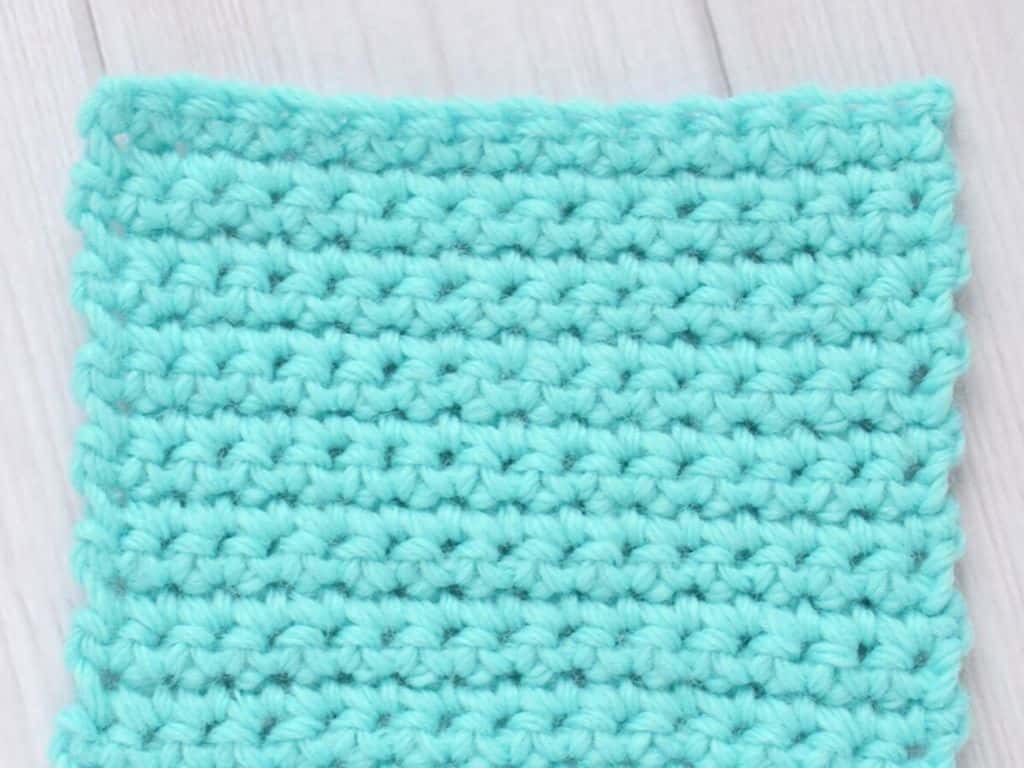
I consider the single crochet stitch to be a measurement to which you can compare other crochet stitches. Rows of single crochet are equal to one stitch in height. The double crochet stitch is twice as tall, a row of treble crochets would be three times the height of a single crochet stitch.
Note, in UK terminology, the single crochet stitch is called double crochet. Not to confuse you, but if you are looking for UK stitch tutorials, reference this handy guide to ensure you are following the correct stitch tutorial.
How to Get Started with SC Stitches
Before you can make any stitches, you need the right materials.
- Yarn, any kind (or as defined by your pattern)
- Crochet hook (defined by your pattern or reference the yarn label for a recommended hook size)
- Yarn needle and scissors
Tips for Successfully Making the Single Crochet Right-Handed
Since the single crochet stitch is so widely used, you will get a lot of practice with it. I recommend that you try to find a tension, meaning how tightly you stitch with the yarn, that feels comfortable to you.
If you crochet too tightly, you might get frustrated trying to insert your hook into the stitches. You can use a larger hook, or “size up” as it’s often called, to help make your stitches bigger.
Crocheting too loose may cause you to feel like your work looks sloppy, and it can be hard to see each individual stitch. If this happens, use a smaller hook size to help tighten up your stitches.
Steps for Making the Single Crochet Stitch If You Are Right-Handed
Make the Foundation
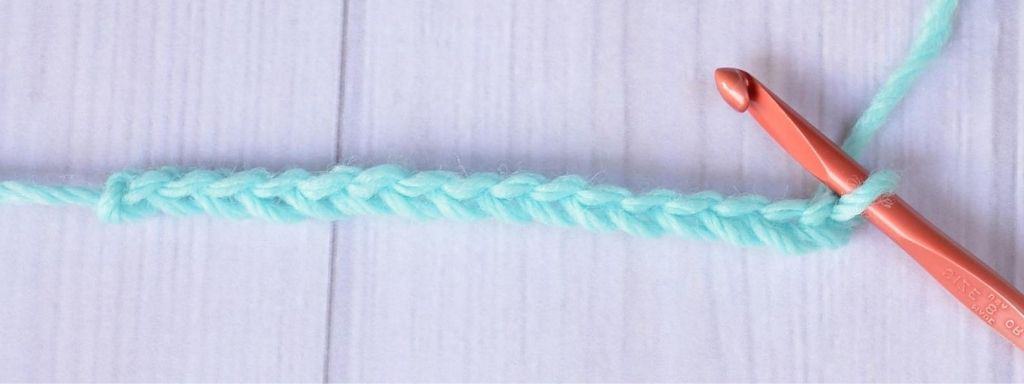
To get started, make a slip knot and foundation chain of about 15-25 chain stitches. This will give you a decent size swatch to work on without getting too bulky.
Written Directions for the Single Crochet Stitch
Let’s look at the entire text description of how to make a single crochet stitch. Then, I’ll break it into each part so that you can see try it yourself.
Remember, even though you are right-handed, you don’t have to do anything other than follow the directions as they are written.
Insert the hook [into a chain or stitch], yarn over and pull up a loop, yarn over and pull through two loops.
Step 1: Insert Your Hook
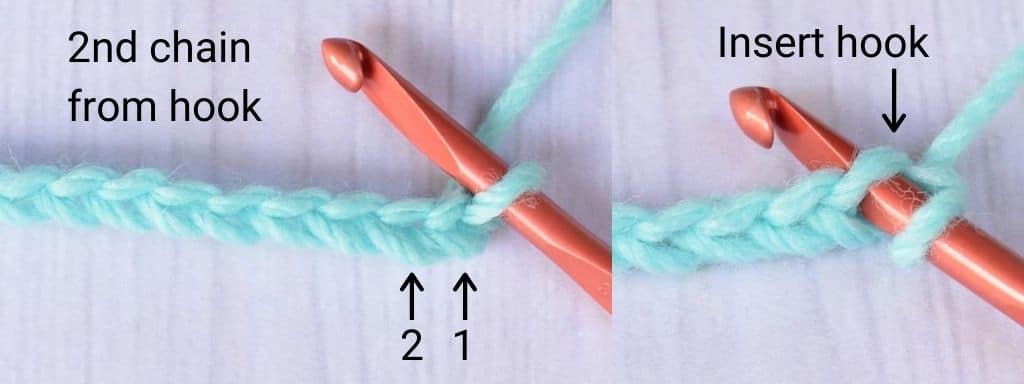
Because you are starting from the beginning, with a foundation chain, you will insert your hook into the second chain from the hook. It will be sticking through to the back of the fabric.
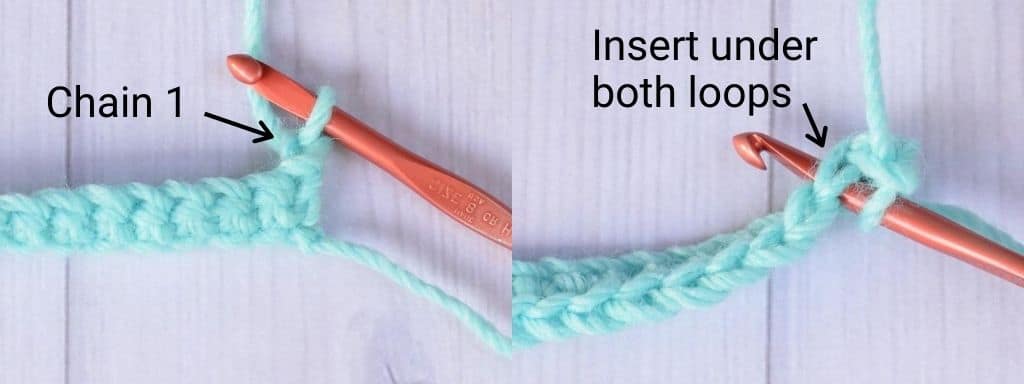
For the second row (and beyond) you will insert your hook under both loops of the stitch in the row below. I’ll show you exactly what this means further down in this tutorial.
Step 2: Yarn Over and Pull Up a Loop
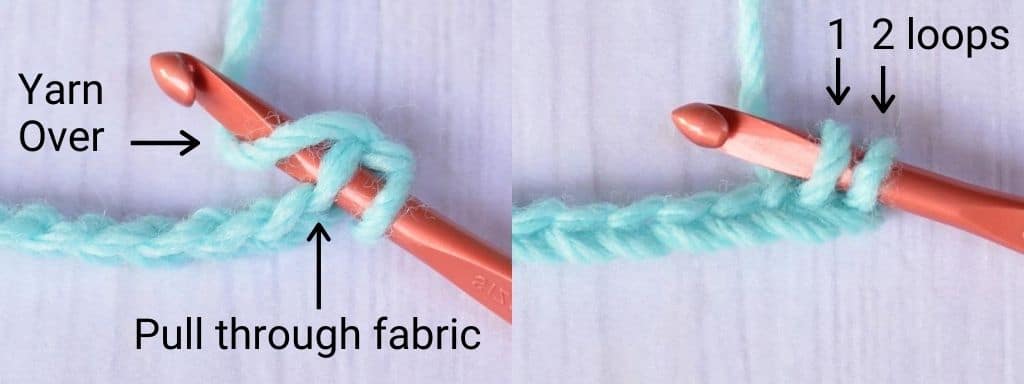
While your hook is poked through the fabric, wrap the yarn around your hook. This is called a “yarn over.”
Then, use the mouth of the hook to catch the yarn and pull it back through to the front of the fabric. You now have two loops on your hook and your hook is no longer poking through the backside of the fabric.
Step 3: Yarn Over and Pull Through Two Loops
This is the last step! Keeping your hook on the front side of the fabric, yarn over (remember, wrap the yarn around the hook). Catch the yarn in the mouth of the hook and pull it through the two loops that are on your hook.
You will now be back to only one loop on your hook. And, you have made your first single crochet stitch!
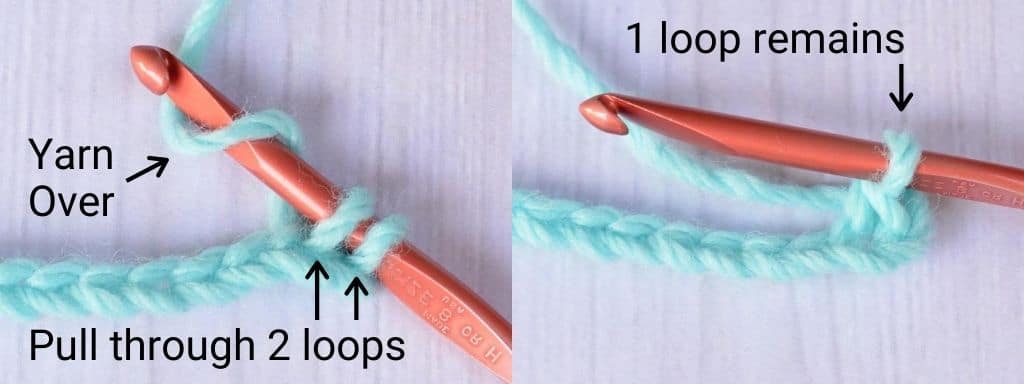
How was that? Easy? Repeat steps 1-3 again, inserting your hook into the next chain stitch. Keep repeating until you get to the end of the chains.

Common Questions About the Single Crochet Stitch
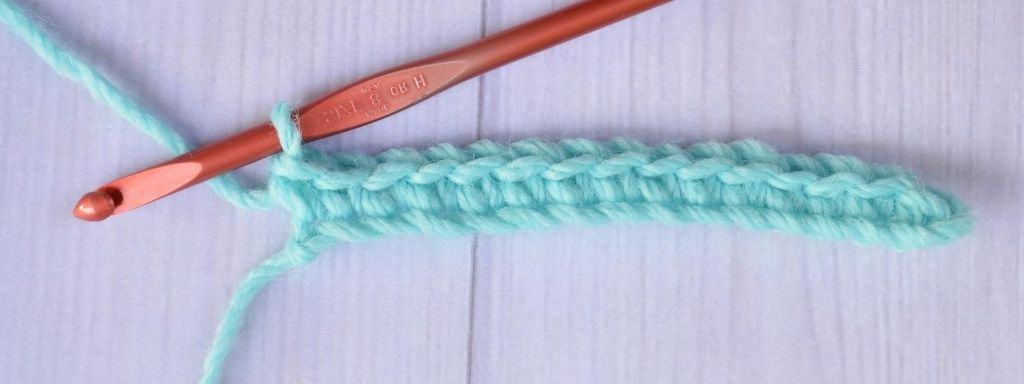
What Does the First Row of Single Crochet Stitches Look Like?
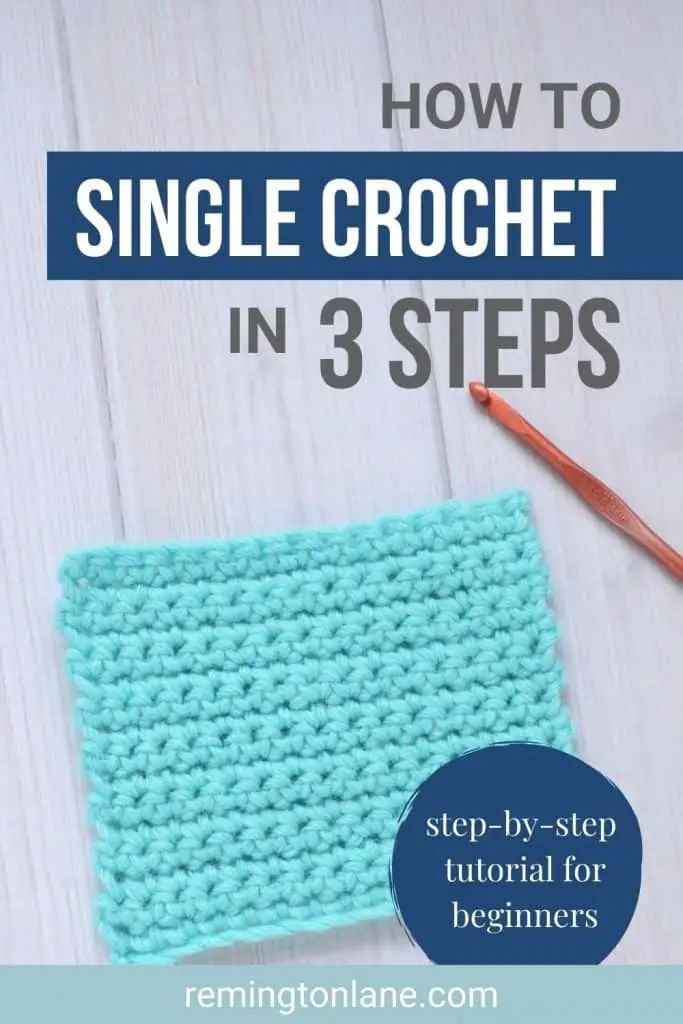
When you get to the end of your first row of single crochets it will start to look like a real project. Remember when I said that every single crochet row is one stitch tall? Essentially, every row of regular single crochets that you make will add this amount of height to your project.
How Do You Transition to the Second Row of Single Crochet Stitches?
For patterns that contain single crochet stitches, the transition from row to row will typically be done in the same way. To transition to the next row of stitches, you have to create a turning chain that will grow your project tall enough for row 2. This is where that stitch height measurement comes in handy again!
The turning chain will be one chain. In your pattern, you will typically see the directions for “Ch 1. Turn” (meaning, Chain 1 and Turn your work). You will see this written somewhere at the end of a row or the beginning of the next row. Either place is fine, but that is what grows your work.
Turning chains define the edge of your work. Will it be straight or jagged or lacey? It depends on how many chains you use. For single crochet rows, if you make more than one chain as your turning chain, you will end up with a hole on the side of the work at the start of each row.
How Do You Finish Off a Project with the Single Crochet Stitch?
When you get to the end of your swatch or crochet project, you have to secure the yarn so that it doesn’t unravel. This is called fastening or finishing off.
To do so, cut your yarn away from the skein about 6 inches from the loop on your hook. Yarn over, and pull the yarn through the loop on your hook. Your hook is no longer in a loop and you can pull the yarn tight. It makes a nice little knot that is hardly noticeable.
Next, take your yarn needle and weave the tail of the yarn through the fabric. Weave it into the stitches where there are natural twists and wraps so that it looks like the tail disappears into the stitches. Once you have weaved in the end to a few places, trim the yarn again close to your work.
What Are the Variations That Can Be Done With the Single Crochet Stitch?
The more you learn to crochet the basic stitches, you will find that the seemingly fancy stitches are just variations of the same stitch. What do I mean by variations? Well, the variation will affect the directions in step 2 above. It’s all about where you insert your hook.
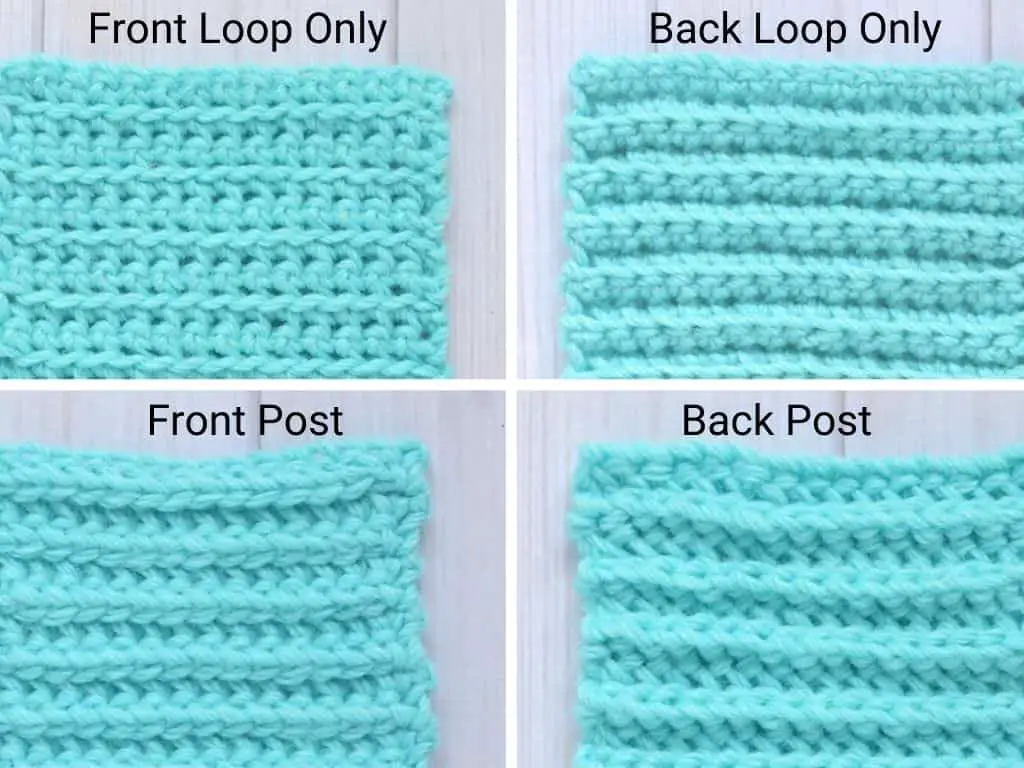
Single Crochet into Front or Back Loops
Some patterns will call for single crochets into the front loop only (FLO) or back loop only (BLO). This will create a beautiful ridge at the bottom of each row.
Single Crochet into Front or Back Post
Another variation would be to insert your hook around the front post (FPsc) or back post (BPsc). These are a little bit more difficult to maneuver your hook than when working in the top loops, but the result is equally as beautiful. Front post and back post stitches can be used to create a variety of textures that can resemble cables or even a basketweave.
Single Crochet Increases
Crochet patterns can also create unique looks by using increasing and decreasing stitch combinations. Increasing stitches will be written as a number of single crochets into the same stitch (example: 2sc into next st). Here you work the entire single crochet stitch and then you insert your hook into the same place for the additional stitches.
Single Crochet Decreases
Decreasing stitches are written as crocheting a number of single crochets together (example: sc2tog, meaning to single crochet two stitches together). To do so, you repeat the hook insertion step into the number of stitches before you move on to step #2.
Single Crochet Between Stitches
Another cool trick you can do with single crochet stitches is to insert your hook into the space between stitches. This can create a look that is similar to a linen stitch. It makes be a slow-growing project but can result in a very sturdy fabric.
The Last Thing You Need to Know About the Single Crochet Stitch
By now I hope you are feeling like you are ready to tackle projects that contain single crochet stitches, possibly even those with the variations I mentioned. Keep practicing the steps so that you can create a swatch that has uniform single crochets throughout.
Want more practice with the single crochet stitch? Check out these fun crochet projects
I’d love to see what you make with the single crochet stitch! Connect with me on Facebook and Instagram and show me your work. To learn more crochet stitches, be sure to visit the stitch tutorial library.


Leave a Reply