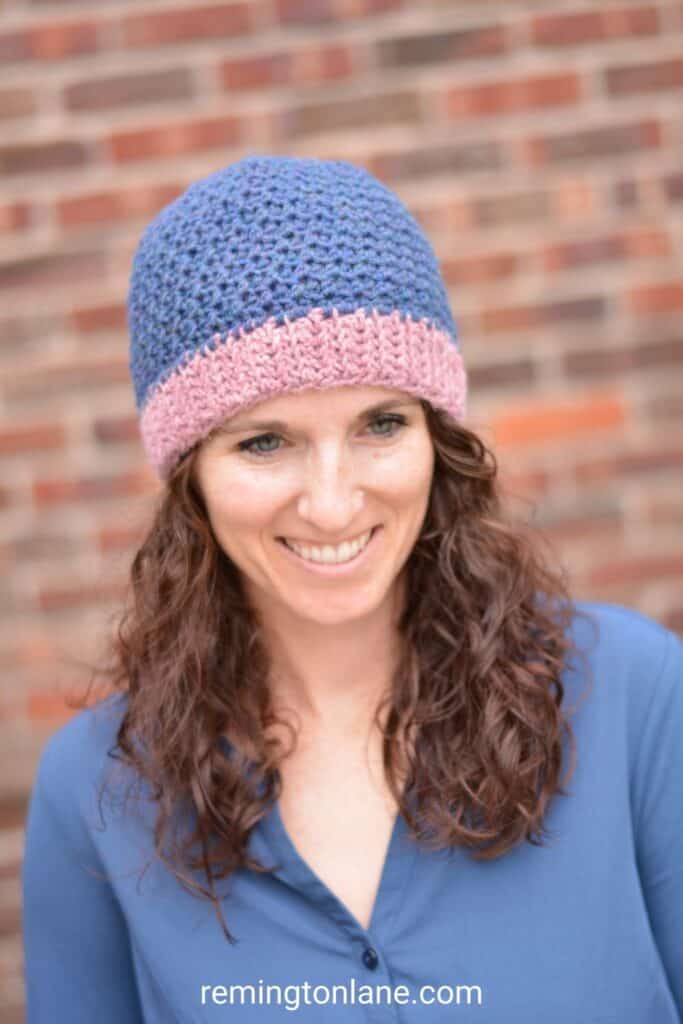
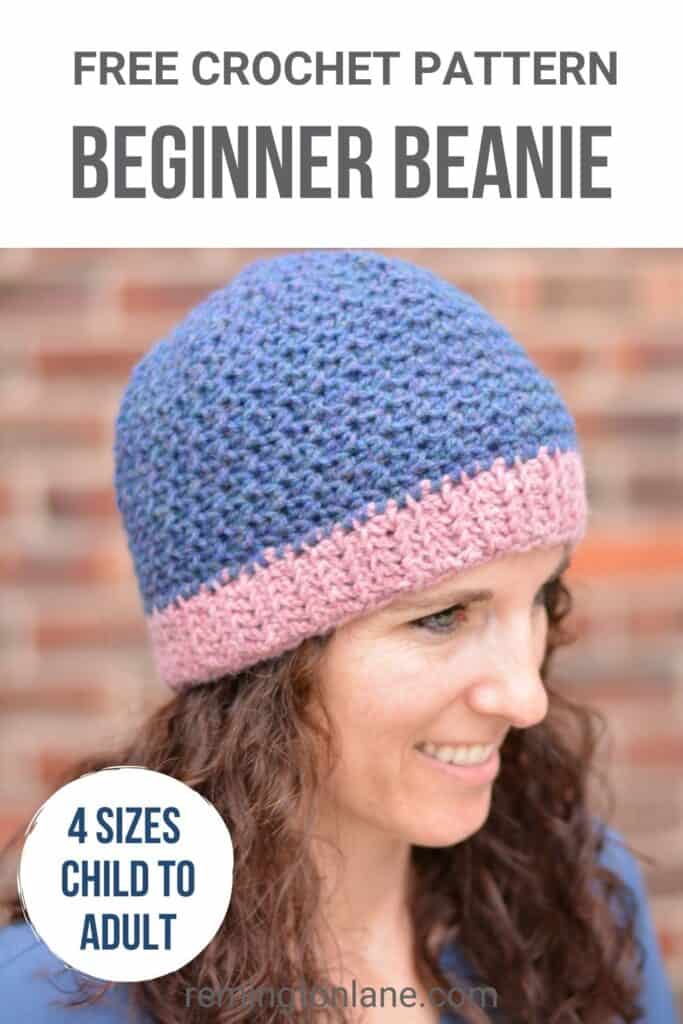
It’s that time of year for making all the beanies and hats right? They are perfect for gifting and when you’re done gifting, you can make more for donations. I love that the color combinations are endless, so you can make the same design multiple times with a different look. This quick and easy beginner crochet hat pattern is one you are going to want to add to your beanie library.
Every time I start making a new hat, my kids each ask if it’s for them. They share their opinions on what colors they want me to use and my middle son is notorious for making questionable color pairings in my opinion, but he loves them so that’s all that matters!
An added bonus to this hat pattern is that the texture is perfect for men too. I wish my husband had the same love for hats that I do, but I guess that just means more hats for the kids and me!
This post may contain affiliate links. If you use these links to buy something, I may earn a small commission. Affiliate links help me continue to provide free content at no extra cost to you.
Introducing the Loops Hat – A Beginner Crochet Pattern
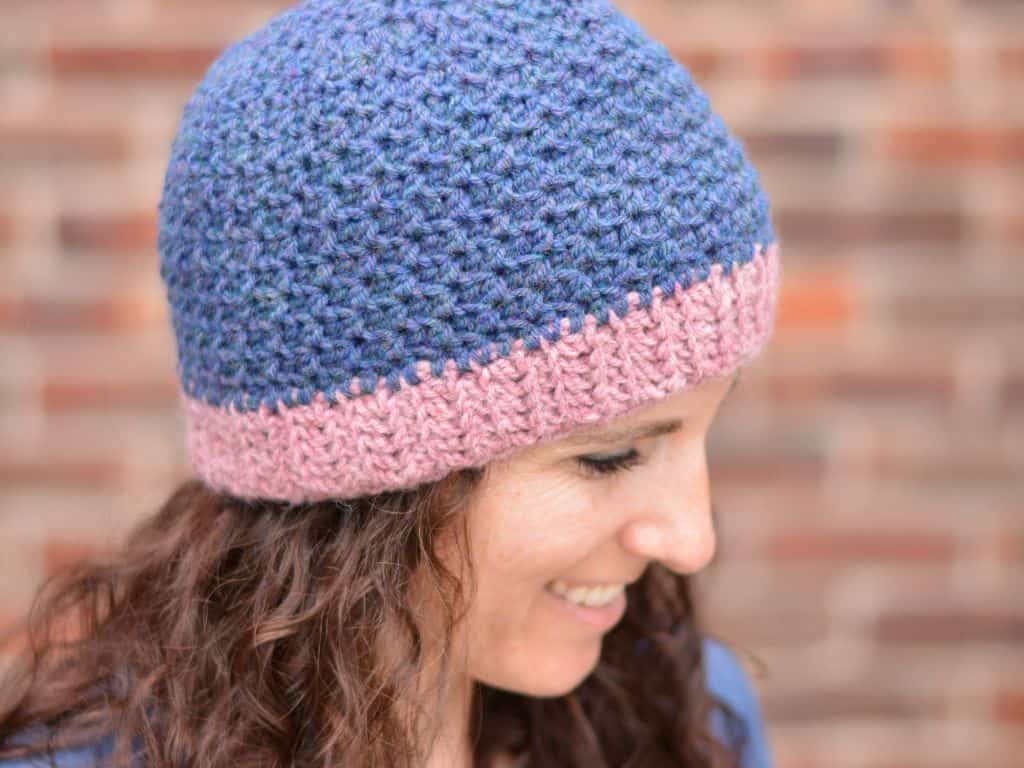
The Loops Hat is the third pattern in the Loops Collection of beginner crochet accessories that you can make quickly. I fell in love with the texture of the front loop, back loop half double crochet combination. It’s super simple but beautiful and very beginner-friendly.
This beanie is made from the bottom-up, meaning that you make the brim first. The brim is worked in rows to the length needed for your size. Then you join the body and work the body in rounds. A few simple decreases at the end and you have yourself a hat!
The written instructions are below, but if you want an ad-free, printable PDF with additional assembly photos and instructions on how to customize the size, you’ll want to purchase this pattern in my Etsy, Ravelry, or LoveCrafts shops.
About the Stitches
Before you can get started with this fast and easy crochet hat pattern, here are some details you need to know.
Skill Level: Easy
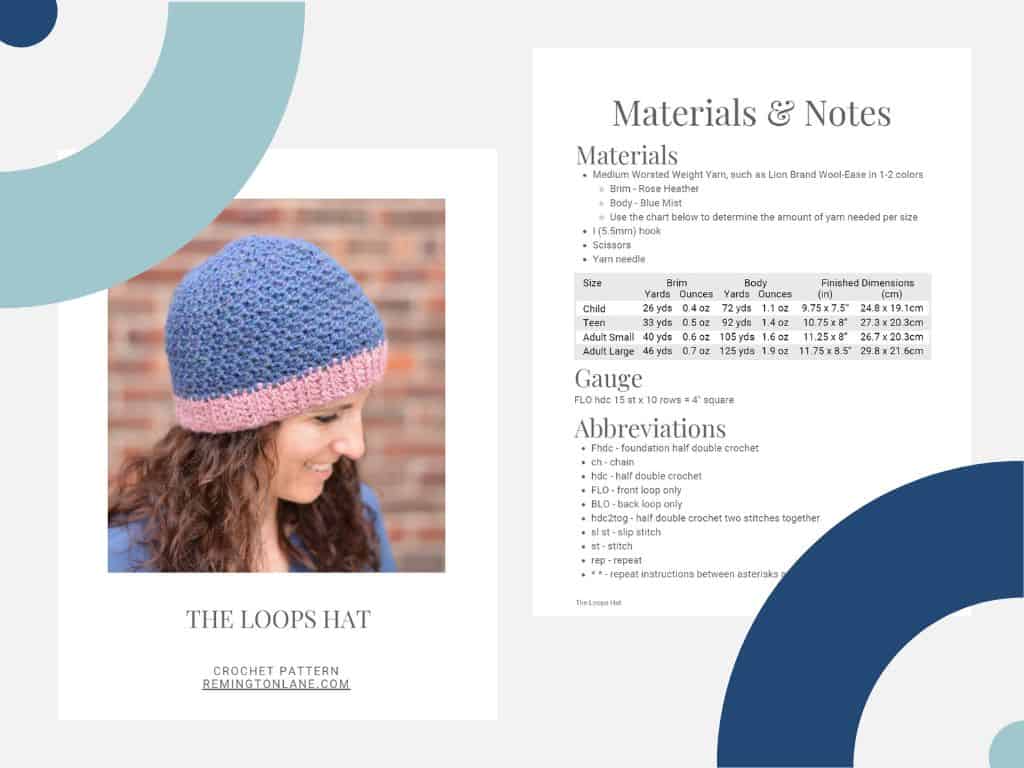
Materials:
- Medium Worsted Weight Yarn in Two Colors
- Brim: Lion Brand Wool-Ease in Rose Heather
- Child – 18-20″ (45.7-50.8 cm) head circumference – 26 yards
- Teen – 20-22″ (50.8-55.9 cm) head circumference – 33 yards
- Adult Small – 21-23″ (53.3-58.4 cm) head circumference – 40 yards
- Adult Large – 22-24″ (55.9-61.0 cm) head circumference – 46 yards
- Body: Lion Brand Wool-Ease in Blue Mist
- Child – 72 yards
- Teen – 92 yards
- Adult Small – 105 yards
- Adult Large – 125 yards
- Brim: Lion Brand Wool-Ease in Rose Heather
- I (5.5mm) Hook
- Scissors
- Yarn Needle
Gauge: FLO hdc 15 st x 10 rows = 4″ square
Finished Dimensions:
- Child – 9.75 x 7.5” (24.8 x 19.1cm)
- Teen – 10.75 x 8” (27.3 x 20.3cm)
- Adult Small – 11.25 x 8” (26.7 x 20.3cm)
- Adult Large – 11.75 x 8.5” (29.8 x 21.6cm)
Stitch Abbreviations:
- Fhdc – foundation half double crochet
- ch – chain
- hdc – half double crochet
- FLO – front loop only
- BLO – back loop only
- hdc2tog – half double crochet two stitches together
- sl st – slip stitch
- st – stitch
- rep – repeat
- * – repeat instructions between asterisks as directed
Pattern Notes:
- US Terms (US to UK terminology conversion)
- Ch 2 counts as a stitch
- Ch 1 in body does not count as a stitch
- Brim of the hat is worked in rows and sewn together before adding the body
- Body is worked in the round
- Number of rows to make for the brim
- Child – 49 rows – approx. 19” (48.3 cm) in length
- Teen – 52 rows – approx. 21” (53.3 cm) in length
- Adult Small – 54 rows – approx. 22” (55.9 cm) in length
- Adult Large – 57 rows – approx. 23” (58.4 cm) in length
- Number of stitches that will be used in the first row of the body
- Child – 74
- Teen – 78
- Adult Small – 82
- Adult Large – 86
- If you make a solid color hat, you can slip stitch the brim together and start the body without having to cut the yarn
- When working the body, the beginning of the round and end of the round may end up being the same stitch
How to Make This Beginner Crochet Hat Pattern
Size: Child
Make the Brim
Row 1: Fhdc 6. Turn (6)
Or, Ch 7
Row 1: hdc in 3rd ch from hook, hdc to end of row. Turn. (6)
Row 2: ch 2, FLO hdc in second st, FLO hdc to end of row. Turn. (6)
Row 3-49: Rep row 2 until you reach the length for the designated size.
Fasten off, leaving a long tail (approximately 8” inches) for sewing.
Align ends together and whip stitch the length of the seam. Fasten off and weave inends.
Add the Body
Join yarn at the seam.
Round 1: ch 1, hdc in same st, evenly space 73 hdc all the way around, sl st to first hdc. (74)
Round 2: ch 1, FLO hdc in same st, * BLO hdc, FLO hdc *, rep from * to * end of the round, sl st to first hdc. (74)
Round 3: ch 1, BLO hdc in same st, * FLO hdc, BLO hdc *, rep from * to * end of the round, sl st to first hdc. (74)
Round 4-8: Repeat rows 2-3
Round 9: ch 1, * FLO hdc2tog, BLO hdc2tog *, rep from * to * to end of the round, sl st to first hdc. (37)
Round 10: ch 1, BLO hdc2tog, * FLO hdc, BLO hdc *, rep from * to * to end of the round, sl st to first hdc. (36)
Round 11: ch 1, * FLO hdc2tog, BLO hdc2tog *, rep from * to * to end of the round, sl st to first hdc. (18)
Round 12: ch 1, BLO hdc in same st, * FLO hdc, BLO hdc *, rep from * to * to end of the round, sl st to first hdc. (18)
Round 13: ch 1, * FLO hdc2tog, BLO hdc2tog *, rep from * to * to end of the round, sl st to first hdc. (9)
Fasten off, leaving a 6-8” tail. Weave the tail in and out of the last row and pull tight to close the hole. Weave in ends.
Add pom (optional).

Size: Teen
Make the Brim
Row 1: Fhdc 6. Turn (6)
Or, Ch 7
Row 1: hdc in 3rd ch from hook, hdc to end of row. Turn. (6)
Row 2: ch 2, FLO hdc in second st, FLO hdc to end of row. Turn. (6)
Row 3-52: Rep row 2 until you reach the length for the designated size.
Fasten off, leaving a long tail (approximately 8” inches) for sewing.
Align ends together and whip stitch the length of the seam. Fasten off and weave inends.
Add the Body
Join yarn at the seam.
Round 1: ch 1, hdc in same st, evenly space 77 hdc all the way around, sl st to first hdc. (78)
Round 2: ch 1, FLO hdc in same st, * BLO hdc, FLO hdc *, rep from * to * end of the round, sl st to first hdc. (78)
Round 3: ch 1, BLO hdc in same st, * FLO hdc, BLO hdc *, rep from * to * end of the round, sl st to first hdc. (78)
Round 4-11: Repeat rows 2-3
Round 12: ch 1, * FLO hdc2tog, BLO hdc2tog, * rep from * to * to end of the round, sl st to first hdc. (39)
Round 13: ch 1, BLO hdc2tog, * FLO hdc, BLO hdc *, rep from * to * to end of the round, sl st to first hdc. (38)
Round 14: ch 1, * FLO hdc2tog, BLO hdc2tog *, rep from * to * to end of the round, sl st to first hdc. (19)
Round 15: ch 1, BLO hdc in same st, * FLO hdc, BLO hdc *, rep from * to * to end of the round, sl st to first hdc. (19)
Round 16: ch 1, FLO hdc in same st, * BLO hdc2tog, FLO hdc2tog *, rep from * to * to end of the round, sl st to first hdc. (10)
Fasten off, leaving a 6-8” tail. Weave the tail in and out of the last row and pull tight to close the hole. Weave in ends.
Add pom (optional).
Size: Adult Small
Make the Brim
Row 1: Fhdc 6. Turn (6)
Or, Ch 7
Row 1: hdc in 3rd ch from hook, hdc to end of row. Turn. (6)
Row 2: ch 2, FLO hdc in second st, FLO hdc to end of row. Turn. (6)
Row 3-54: Rep row 2 until you reach the length for the designated size.
Fasten off, leaving a long tail (approximately 8” inches) for sewing.
Align ends together and whip stitch the length of the seam. Fasten off and weave in ends.
Add the Body
Join yarn at the seam.
Round 1: ch 1, hdc in same st, evenly space 81 hdc all the way around, sl st to first hdc. (82)
Round 2: ch 1, FLO hdc in same st, * BLO hdc, FLO hdc *, rep from * to * end of the round, sl st to first hdc. (82)
Round 3: ch 1, BLO hdc in same st, * FLO hdc, BLO hdc *, rep from * to * end of the round, sl st to first hdc. (82)
Round 4-11: Repeat rows 2-3
Round 12: ch 1, * FLO hdc2tog, BLO hdc2tog *, rep from * to * to end of the round, sl st to first hdc. (41)
Round 13: ch 1, BLO hdc2tog, * FLO hdc, BLO hdc *, rep from * to * to end of the round, sl st to first hdc. (40)
Round 14: ch 1, * FLO hdc2tog, BLO hdc2tog *, rep from * to * to end of the round, sl st to first hdc. (20)
Round 15: ch 1, BLO hdc in same st, * FLO hdc, BLO hdc *, rep from * to * to end of the round, sl st to first hdc. (20)
Round 16: ch 1, * FLO hdc2tog, BLO hdc2tog *, rep from * to * to end of the round, sl st to first hdc. (10)
Fasten off, leaving a 6-8” tail. Weave the tail in and out of the last row and pull tight to close the hole. Weave in ends.
Add pom (optional).
Size Adult Large
Make the Brim
Row 1: Fhdc 6. Turn (6)
Or, Ch 7
Row 1: hdc in 3rd ch from hook, hdc to end of row. Turn. (6)
Row 2: ch 2, FLO hdc in second st, FLO hdc to end of row. Turn. (6)
Row 3-57: Rep row 2 until you reach the length for the designated size.
Fasten off, leaving a long tail (approximately 8” inches) for sewing.
Align ends together and whip stitch the length of the seam. Fasten off and weave in ends.
Add the Body
Join yarn at the seam.
Round 1: ch 1, hdc in same st, evenly space 85 hdc all the way around, sl st to first hdc. (86)
Round 2: ch 1, FLO hdc in same st, * BLO hdc, FLO hdc *, rep from * to * end of the round, sl st to first hdc. (86)
Round 3: ch 1, BLO hdc in same st, * FLO hdc, BLO hdc *, rep from * to * end of the round, sl st to first hdc. (86)
Round 4-13: Repeat rows 2-3
Round 14: ch 1, * FLO hdc2tog, BLO hdc2tog *, rep from * to * to end of the round, sl st to first hdc. (43)
Round 15: ch 1, BLO hdc2tog, * FLO hdc, BLO hdc *, rep from * to * to end of the round, sl st to first hdc. (42)
Round 16: ch 1, * FLO hdc2tog, BLO hdc2tog *, rep from * to * to end of the round, sl st to first hdc. (21)
Round 17: ch 1, BLO hdc in same st, * FLO hdc, BLO hdc *, rep from * to * to end of the round, sl st to first hdc. (21)
Round 18: ch 1, FLO hdc in same st, * BLO hdc2tog, FLO hdc2tog *, rep from * to * to end of the round, sl st to first hdc. (11)
Fasten off, leaving a 6-8” tail. Weave the tail in and out of the last row and pull tight to close the hole. Weave in ends.
Add pom (optional).
Purchase the Loops Crochet Beanie Pattern
You can buy the ad-free, PDF of this pattern on Etsy, Ravelry, and LoveCrafts.
More Beginner Crochet Patterns to Love
I love seeing your finished projects! If you enjoyed making the Loops Hat, I’d love to see yours on Instagram. To be sure I don’t miss it, please tag me @remingtonlanecrochet when you share your photos!

Copyright 2020-2024 Remington Lane Crochet, LLC. This pattern and its images are copyright protected and the sole property of Remington Lane Crochet LLC. Please do not redistribute, transfer, or sell the pattern, or alter it to claim as your own.
You may sell any products you create from this pattern. Please credit the designer by linking online listings to https://remingtonlane.com/ or by tagging @remingtonlanecrochet

Leave a Reply